
Dungeons
The Crystal Sanctum for one to four players: its areas, checkpoints, the Titan and how difficulty grows with your party.
Crystal SanctumValues in testing. This is in the game, but its numbers are still being tested and may change.
A sanctuary of floating platforms over an abyss. A Titan sleeps in its arena, bound by three arcane pylons and two guardians.
You enter through the Waygate Keeper, Isolde Vane, in Ashen Haven (or from the Teleport window, under Dungeons). You leave through the portal at the entrance.
Requirements
- Entry level
- Awakened 18+
- Recommended
- Awakened 22–30
- Party size
- 1–4
- Target duration
- ~20 min
The target time is not a timer: nothing ends if you run past it. These values are in testing.
The 7 areas of the Sanctum and its 3 checkpoints
- Destroy the three arcane pylons: Left Wing, Central Crystal Chamber, Right Wing.
- Defeat the two guardians in the upper sanctuaries.
- Climb to the Titan Arena and defeat the Titan.
Packs stand apart and only help their own: pull one at a time. Follow the gold arrow to the nearest objective. A fallen hero watches; the run fails only if everyone falls. Nothing ends the run on the clock: about 20 minutes is the target, so take your time.
- #1Checkpoint
Entrance Hall
Safe hall · the exit portal is here
- #2
Left Wing
An arcane pylon stands here
- #3
Upper Left Sanctuary
A guardian holds this sanctuary
- #4Checkpoint (after 3 of 5 objectives)
Central Crystal Chamber
An arcane pylon stands here
- #5
Upper Right Sanctum
A guardian holds this sanctuary
- #6
Right Wing
An arcane pylon stands here
- #7Checkpoint (after 5 of 5 objectives)
Titan Arena
The Titan waits
Objectives: 3 arcane pylons and 2 guardians. When all have fallen, the Titan wakes. If the whole party falls it stands again at the last checkpoint reached; unfinished monsters return, cleared progress is kept. Common monsters return after 180 s; pylons and guardians never do.
Scaling with party sizeValues in testing
The health of the monsters and the Titan grows with the number of players confirmed at entry. Their damage does not grow. The values are proposed and checked by playtests.
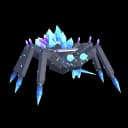 MeleeLv 22(22× in the dungeon)
Crystal Shardling
Health (1p)1× of baseFast crystal swarmers that rush in packs. Clear them with area skills.
Attacks every 1.2 s35 XP · 4 goldEmber Shard 20%
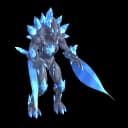 MeleeLv 23(13× in the dungeon)
Crystal Reaper
Health (1p)1× of baseA fast melee striker; stun or root it to protect ranged allies.
Attacks every 1.4 s90 XP · 12 goldEmber Shard 30%Ruin Core 4%
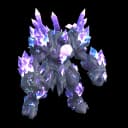 MeleeLv 23(8× in the dungeon)
Crystal Brute
Health (1p)1× of baseSlow and armoured, with a wide heavy slam (2.8 m). Step out of its swing.
Attacks every 3.2 s100 XP · 15 goldEmber Shard 60%
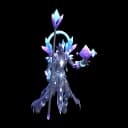 MeleeLv 24(4× in the dungeon)
Crystal Channeler
Health (1p)1× of baseCasts from up to 12 m (prefers 8 m) with a 1.3 s windup. Close in or break line of sight.
Attacks every 3.5 s110 XP · 16 goldEmber Shard 40%
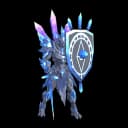 EliteLv 25(2× in the dungeon)
Crystal Guardian
Health (1p)1× of baseHolds an upper sanctuary and never respawns. Its front is armoured (35% less damage in a 100 degree arc): hit it from behind or in the 1.75 s opening after its slam.
Attacks every 4 s300 XP · 45 goldEmber Shard 100%Ruin Core 25%
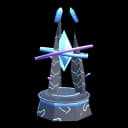 StructureLv 24(3× in the dungeon)
Arcane Pylon
Health (1p)1× of baseA stationary arcane pylon guarded by a pack. Destroying all three, with both guardians, wakes the Titan.
Attacks every 1 s
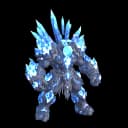 BossLv 26(1× in the dungeon)
Crystal Titan
Health (1p)1× of baseThree phases: a telegraphed slam; below 65% health, rings with a safe centre and waves of shardlings (3 every 14 s, up to 6 alive); below 30%, burning zones on the floor and faster attacks.
Attacks every 4.8 s1800 XP · 250 goldEmber Shard 100%Ruin Core 100%
Titan: 1 level-compatible equipment roll · 100%. Personal rewards settle at expedition end. First node kills only; contribution, level falloff and currency limits apply.
The Titan's 3 phases
- Titan: Awakening · 100% → 65%
Watch the slam telegraph and step out of it.
- Titan: Overload · 65% → 30%
Rings with a safe centre: step inside them.
- Titan: Fury · 30% → 0%
Avoid the burning zones on the floor.
Other dungeons
- Sealed dungeonComing soon
Stilt houses on the south road, where the marsh mist hides the Drowned Bell Tower. A sealed dungeon waits nearby.
- Sealed dungeonComing soon
Tents on the south-west shore by the Sunken Lighthouse; a sealed dungeon lies further along the coast.